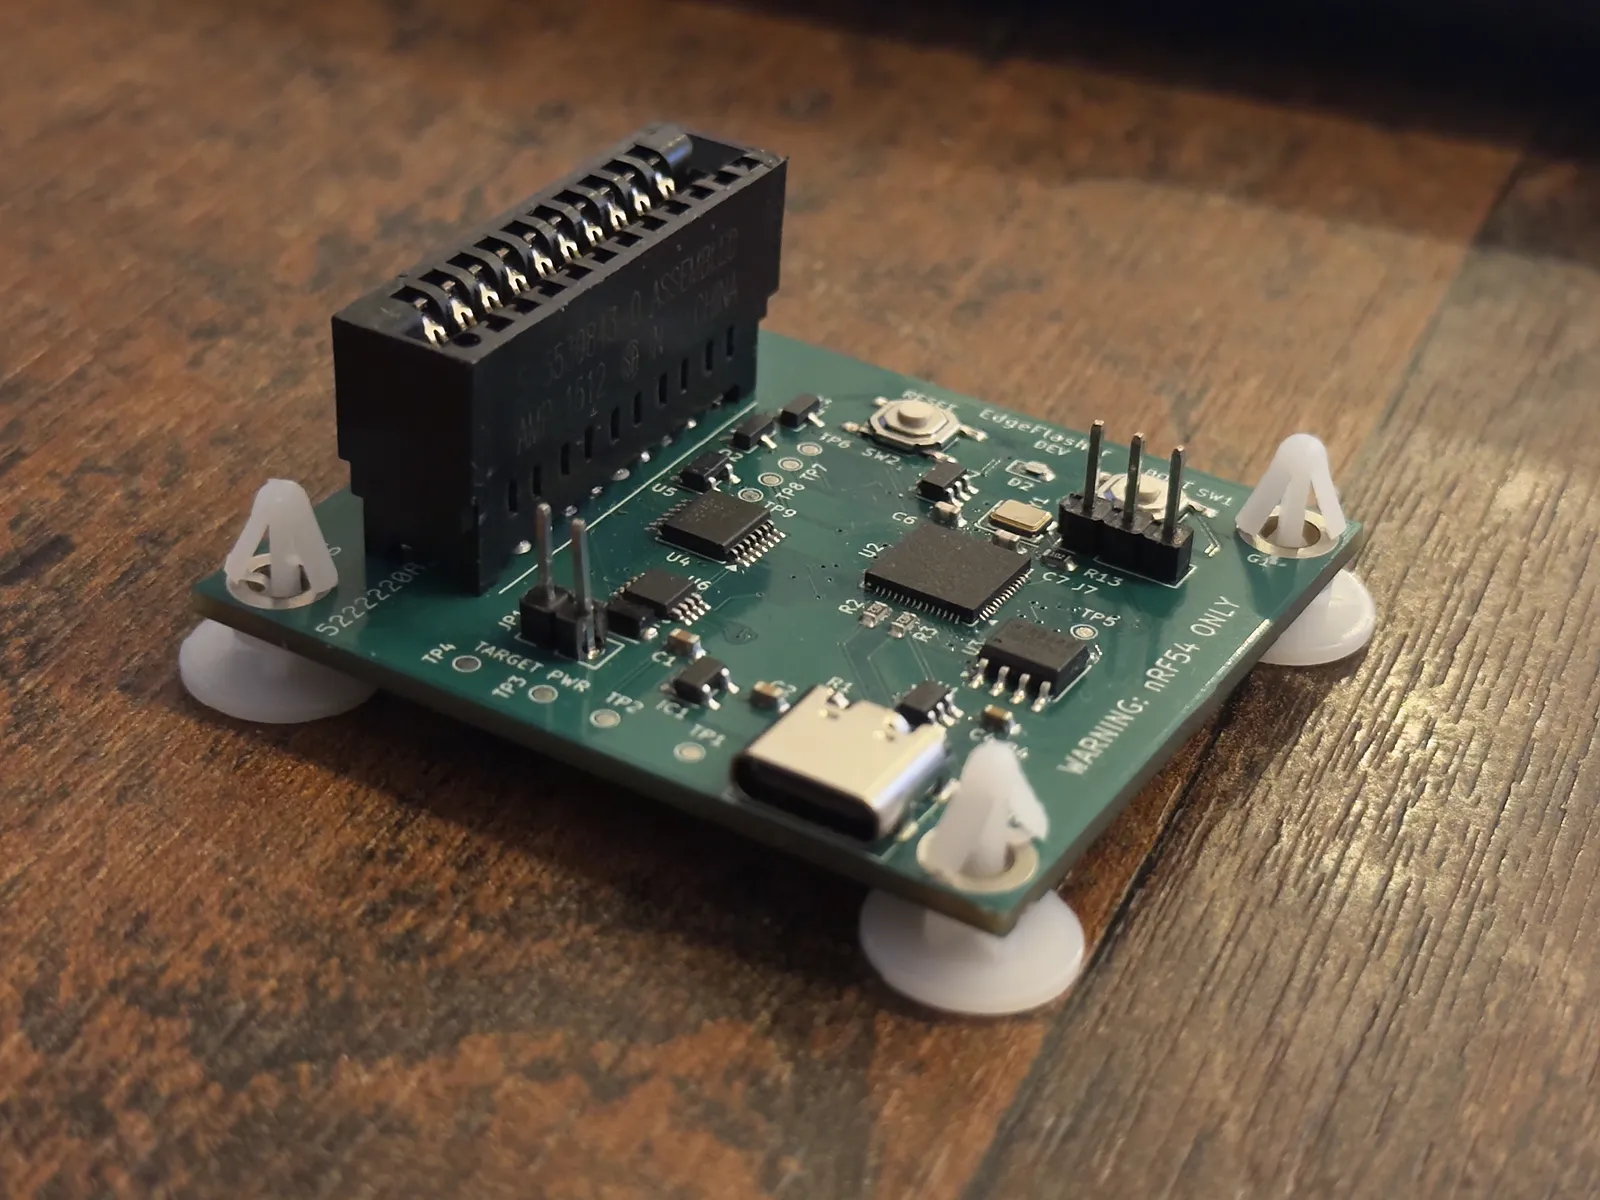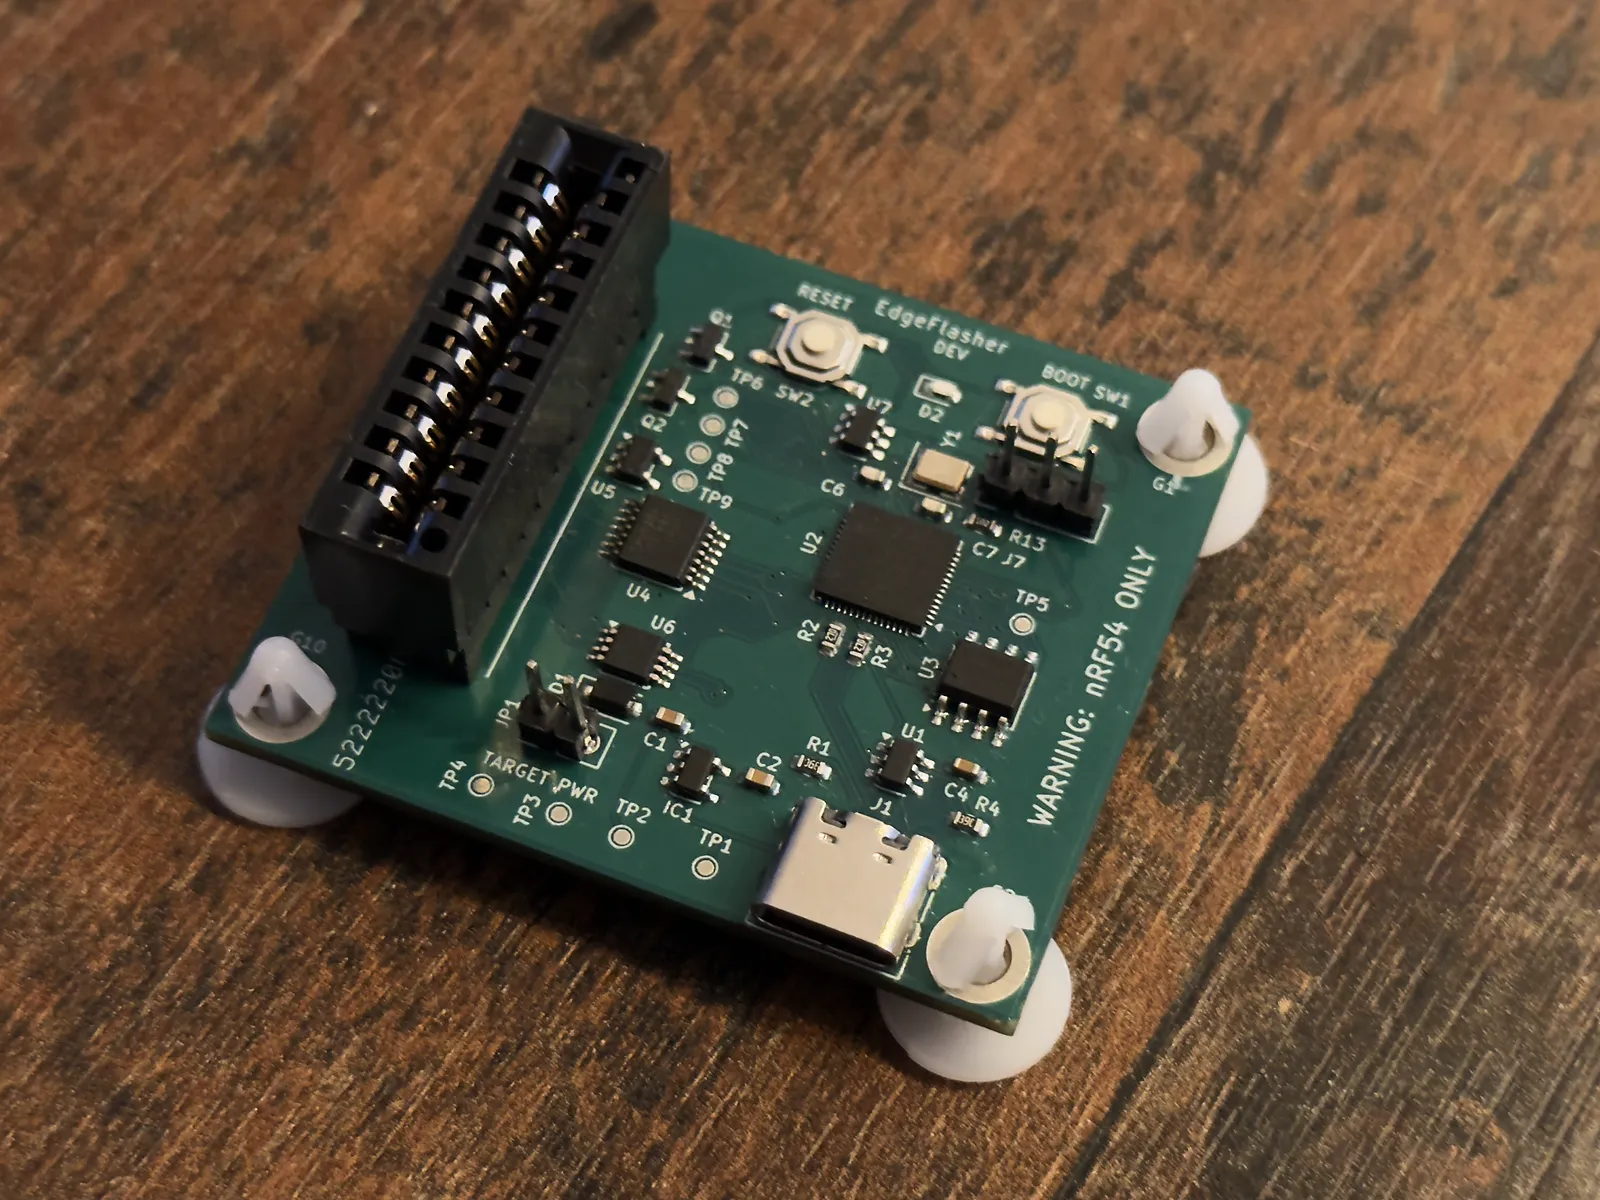
Waarom
Er staan meerdere projecten op stapel die draaien op het nRF-platform van Nordic Semiconductor. Voor al die boards wilde ik één devkit die programmeren, debuggen en testen simpel maakt: board erin, knop indrukken, klaar. Geen gepiel met losse draadjes en een rij command-line tools.
Hardware
Het hart is een RP2040 met 2 MB flash en een 12 MHz-kristal. Hij meldt zich over USB-C als standaard CMSIS-DAP-debugprobe, met daarnaast een USB-I²C-interface.
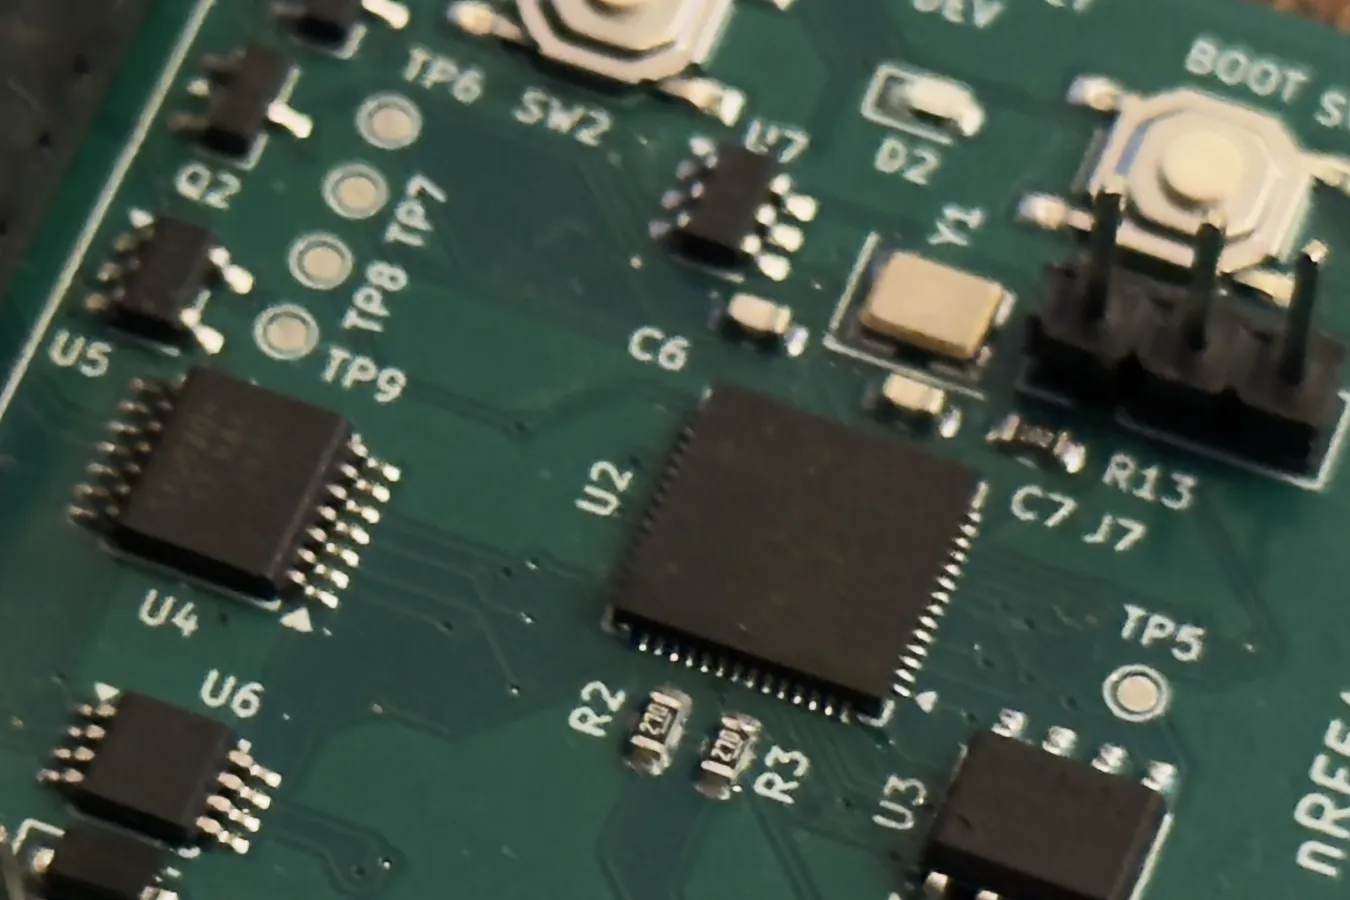
Het target draait op zijn eigen spanning, ergens tussen 1,8 en 3,6 V. Daarom zit er tussen probe en target een laag niveauvertalers. In totaal zitten er 8 IC's op het board:
| ref | chip | functie |
|---|---|---|
| U1 | USBLC6-2P6 | ESD-bescherming van de USB-datalijnen |
| IC1 | AP2112K-3.3 | 3,3 V-spanningsregelaar |
| U2 | RP2040 | Microcontroller voor de debugprobe en de USB-I²C-interface |
| U3 | W25Q16JV | Flashgeheugen voor de firmware (16 Mbit / 2 MB) |
| U4 | TXU0304 | Vertaling van signaalspanningen tussen probe en target |
| U5 | SN74LVC1G125 | Signaalbuffer met uitschakelbare uitgang |
| U6 | TCA9517 | I²C-buffer en niveauvertaler |
| U7 | SN74AXC1T45 | Enkelkanaals niveauvertaler |
Daarnaast nog twee BSS138-MOSFETs (Q1, Q2) en een TARGET PWR-jumper om het target vanuit de probe te voeden.
De connector
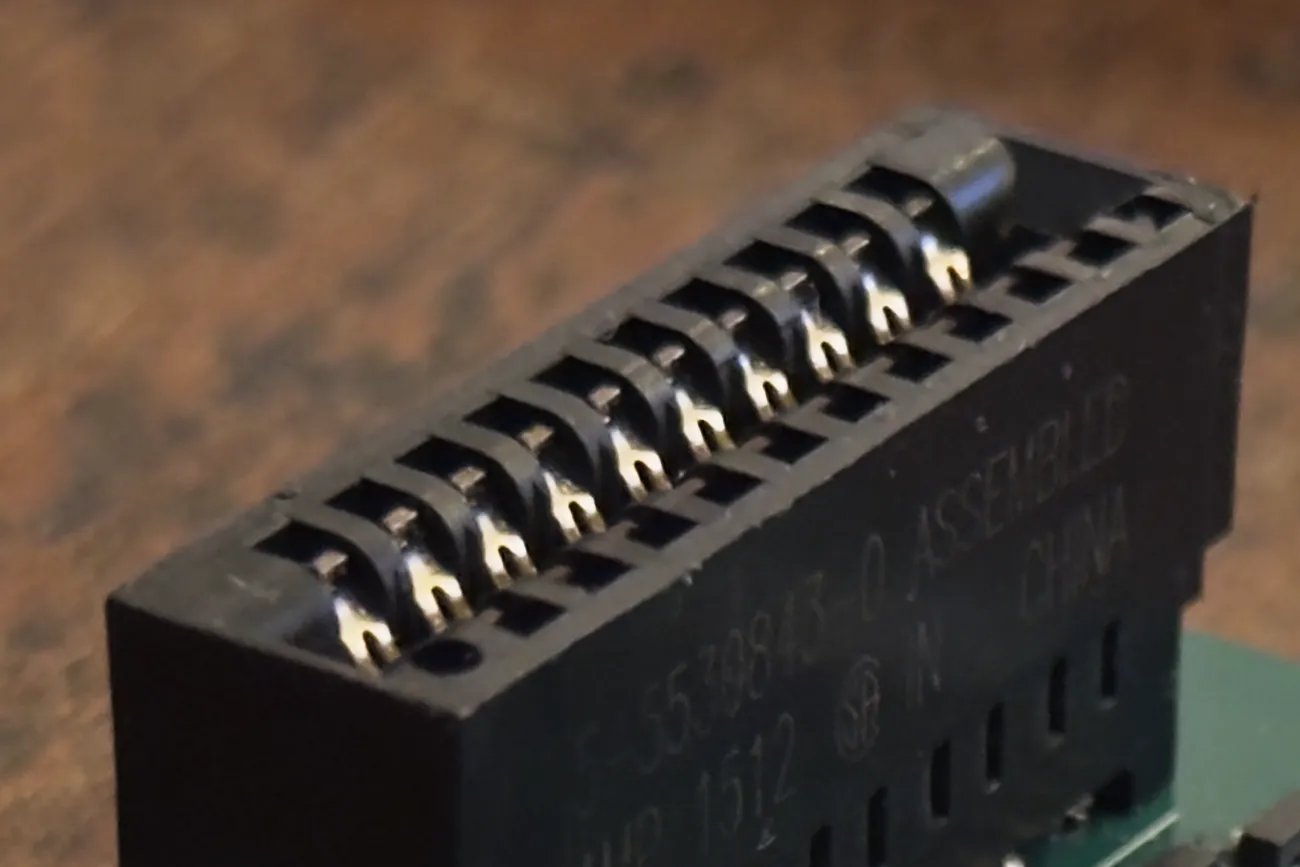
De naam zegt het al: het target heeft zelf edge-fingers en gaat direct in een 20-polige card-edge connector. Geen pogo-pins en geen kabeltjes. En het is poka-yoke: hoe je een board er ook in steekt, het werkt altijd en er kan niks stuk.
Waarom "nRF54 ONLY"?
Er bestaat ook een oudere serie EdgeFlashers: de MicroFlasher. Die heeft alleen een CH340 aan boord, een USB-naar-serieel-chip, en kan dus geen SWD. Om verwarring tussen de twee te voorkomen staat de waarschuwing op beide kanten van de print.
Firmware & Studio
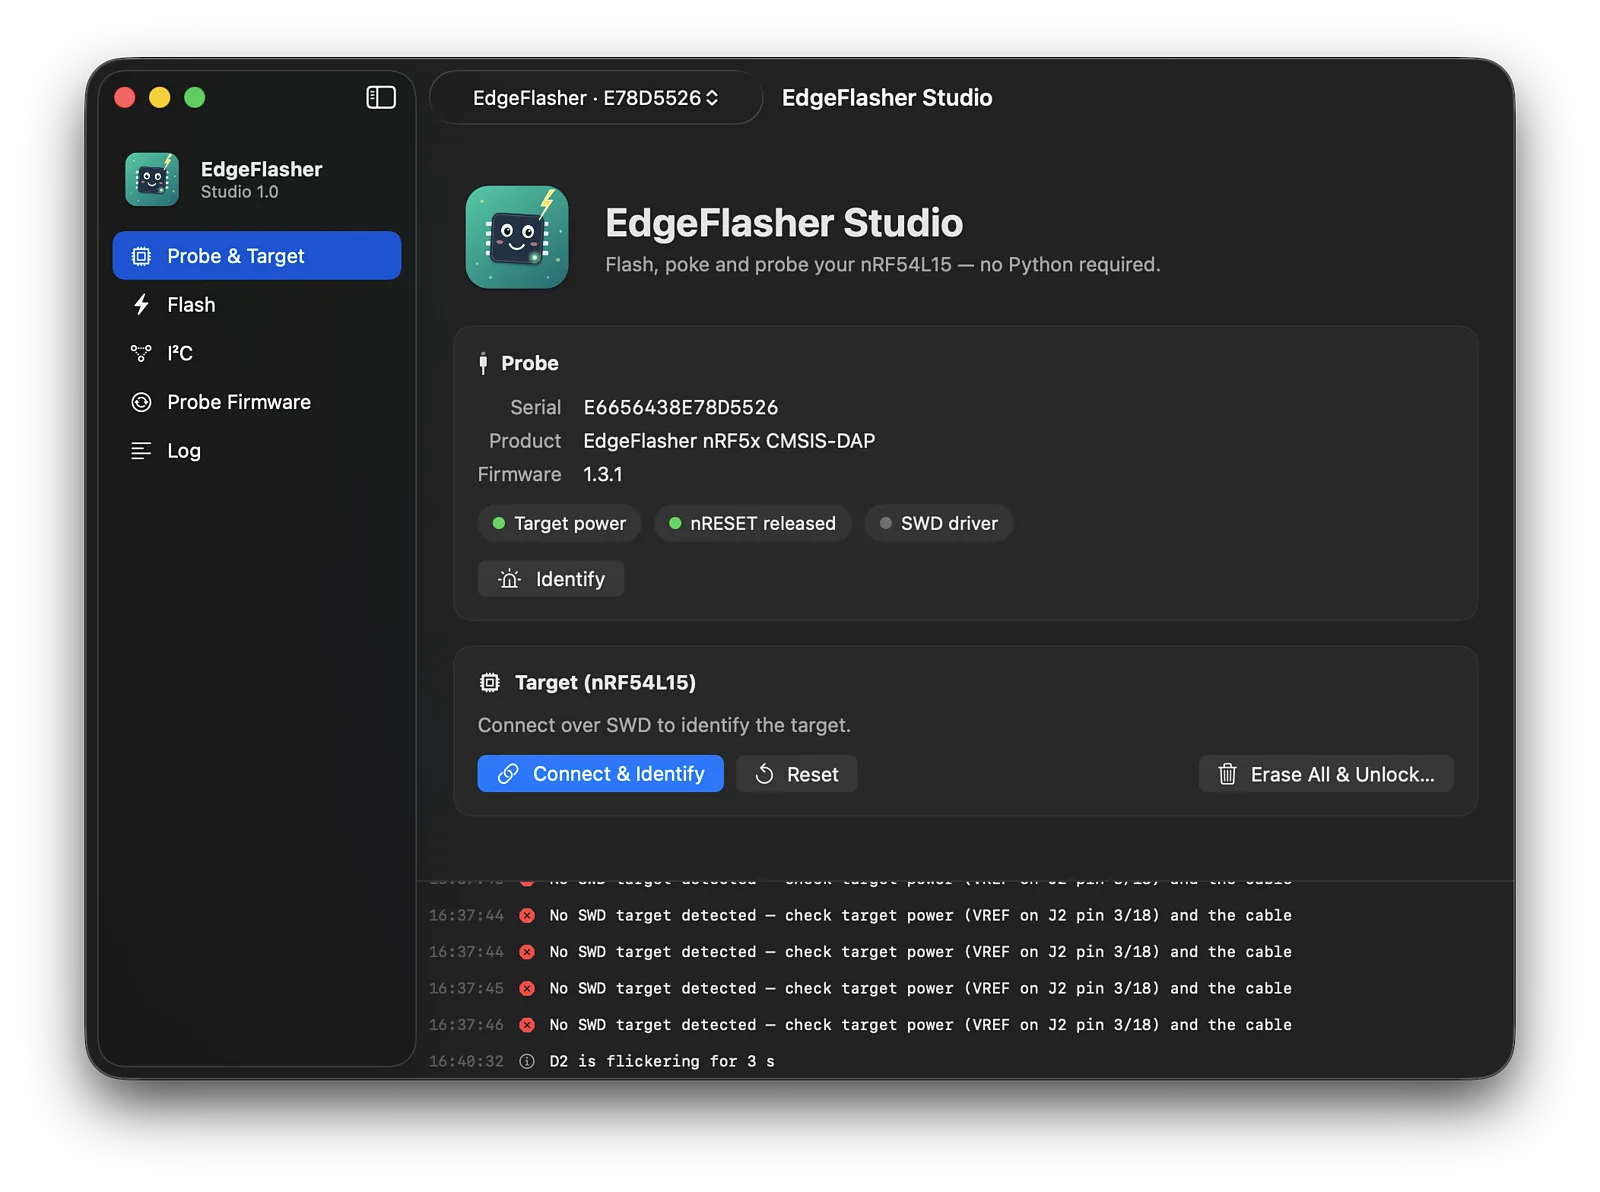
De probe-firmware is geschreven in C op Zephyr. Bij de hardware hoort EdgeFlasher Studio, een native app in Swift: "Flash, poke and probe your nRF54L15, no Python required."
Met Studio verbind en identificeer je probe en target, flash je firmware, maak je een vergrendelde chip weer vrij met Erase All & Unlock, scan en lees je de I²C-bus en update je de firmware van de probe zelf. De knop Identify laat de LED op het board knipperen, handig als er meerdere probes aan je laptop hangen.
In één keer goed
Dit is mijn eerste 4-laags board, en verbazingwekkend genoeg werkte de eerste revisie meteen.
Achterkant
74 componenten in totaal, waarvan 41 op de onderkant: vooral passives. En natuurlijk het logo in de silkscreen.
Why
Several upcoming projects run on Nordic Semiconductor's nRF platform. For all of those boards I wanted one devkit that makes programming, debugging and testing simple: plug the board in, press a button, done. No fiddling with loose wires and a stack of command-line tools.
Hardware
At its heart is an RP2040 with 2 MB of flash and a 12 MHz crystal. Over USB-C it shows up as a standard CMSIS-DAP debug probe, plus a USB-I²C interface.
The target runs at its own voltage, anywhere from 1.8 to 3.6 V. That's why there's a layer of level translators between probe and target. The board has 8 ICs in total:
| ref | chip | function |
|---|---|---|
| U1 | USBLC6-2P6 | ESD protection for the USB data lines |
| IC1 | AP2112K-3.3 | 3.3 V regulator |
| U2 | RP2040 | Microcontroller for the debug probe and the USB-I²C interface |
| U3 | W25Q16JV | Firmware flash (16 Mbit / 2 MB) |
| U4 | TXU0304 | Voltage translation between probe and target |
| U5 | SN74LVC1G125 | Signal buffer with tri-state output |
| U6 | TCA9517 | I²C buffer and level translator |
| U7 | SN74AXC1T45 | Single-channel level translator |
Plus two BSS138 MOSFETs (Q1, Q2) and a TARGET PWR jumper to power the target from the probe.
The connector
The name gives it away: the target has its own edge fingers and goes straight into a 20-position card-edge connector. No pogo pins, no cables. And it's poka-yoke: whichever way you plug a board in, it always works and nothing can break.
Why "nRF54 ONLY"?
There's also an older series of EdgeFlashers: the MicroFlasher. Those only carry a CH340, a USB-to-serial chip, so they can't do SWD. To avoid mixing the two up, the warning is printed on both sides of the board.
Firmware & Studio
The probe firmware is written in C on Zephyr. The hardware comes with EdgeFlasher Studio, a native app written in Swift: "Flash, poke and probe your nRF54L15, no Python required."
Studio lets you connect and identify probe and target, flash firmware, recover a locked chip with Erase All & Unlock, scan and read the I²C bus, and update the probe's own firmware. The Identify button blinks the LED on the board, handy when several probes are plugged into your laptop.
Right first time
This is my first 4-layer board, and surprisingly enough the first revision worked straight away.
Back side
74 components in total, 41 of them on the bottom: mostly passives. And of course the logo in the silkscreen.